


by Dakota Storage Buildings, on August 27, 2024

When purchasing an outdoor storage shed, ensuring that it’s stable and will last for years is crucial. Many homeowners focus on size, style, or color but overlook a solid foundation. The shed’s foundation can be the difference between a building that stays level and dry for years and one that quickly develops problems like sticking doors, soft floors, or a subtle lean.
A well-constructed storage shed foundation is the shed’s “invisible hero.” It provides the support your building needs to stay level, secure, and protected from the elements. By investing time and resources into selecting and building the right foundation, you can prevent future issues and enjoy a reliable storage solution for years.
Let’s look at why your foundation matters, how delivery vs. on-site building affects your options, how to prepare your site, the best foundation types to consider, and simple maintenance tips to keep your shed performing well long term.
Why Your Shed Needs a Solid Foundation
A solid foundation keeps the structure stable, protects it from the ground below, and supports the overall integrity of the building over time.
Ensure Longevity With a Stable Base
A stable shed base prevents the building from shifting or settling, which can cause structural issues over time. Without a proper foundation, the weight of the shed can cause it to sink unevenly, leading to cracks in the floors, walls, and roof. This instability compromises the shed’s durability and safety, making it essential to start with a strong storage shed foundation that can support the load and withstand environmental pressures.
In the Midwest, freeze–thaw cycles and frost can also shift an unprepared base. Clay-heavy soils retain water, which expands and contracts as temperatures change. Without a solid, well-compacted foundation, that movement can be transmitted into the shed and shorten its lifespan.
Protect Your Shed from Moisture
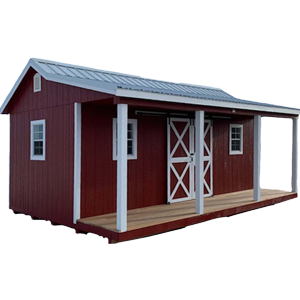
Elevating the shed off the ground helps protect it from moisture, preventing rot and corrosion. If an outdoor storage shed does not have the proper foundation, water can easily seep underneath, causing wood to rot and metal to rust. By keeping the shed elevated, you create a barrier that keeps water away from the materials, significantly extending the life of the shed and reducing the risk of water-related damage.
Proper drainage systems, like a gravel base for sheds, help direct water away and keep things dry, especially during spring thaw or heavy rains when melting snow runoff can otherwise pool around the building.
Secure Your Shed Against Pests
A solid storage shed foundation can also deter pests from entering and damaging the shed. Rodents, insects, and other critters are less likely to invade a shed that has a secure, sealed, and elevated base. This protection is crucial for maintaining the structural integrity of the shed and preventing damage to stored items.
By choosing materials like gravel, concrete, or pressure-treated wood and installing them correctly, you can create a safer, more pest-resistant storage space.
Avoid Misalignment for Enhanced Functionality
Leveling the ground for sheds keeps doors and windows functioning properly. When a shed is built on an uneven or shifting base, doors and windows can go out of alignment, making them difficult to open and close. Misalignment can also create gaps around openings that allow in water, cold air, and pests.
In many cases, homeowners first notice foundation issues when doors start sticking or latches no longer line up. A foundation that is properly leveled and compacted helps keep structural elements aligned, which maintains the shed’s usability and appearance.
Reducing Maintenance Costs
Investing in a solid storage shed foundation upfront can save on costly repairs and maintenance in the long run. While the initial investment may feel higher, it reduces the need for frequent fixes and premature replacements.
A well-built foundation extends the life of your outdoor storage shed, providing a strong return on investment through reduced maintenance costs and prolonged durability, especially in climates with clay soil, frost, and seasonal ground movement.
Choosing Between Delivery and On-Site Build
Your foundation choice is closely tied to how your shed will be installed.

When Delivery Works
In many cases, delivery is the simplest option. If your yard has a reasonably wide access path and your foundation is already prepared and level, a fully built shed can be delivered and set directly on a gravel pad or wood foundation.
Delivery works best when:
- Access paths are wide enough
- The ground is level and prepped
- The shed size fits through gates and around corners
- A gravel or wood foundation is already installed
When On-Site Build Is the Better Fit
However, some properties make delivery difficult. Narrow gates, tight turns, low-hanging branches, or steep slopes can prevent a fully assembled shed from reaching its final location. In those situations, on-site construction is often the better fit. The shed is brought in sections and assembled in place, using the same materials and specifications as a delivered building.
Concrete Slabs May Require On-Site Assembly
Concrete slabs are another reason on-site builds are often required. Because a shed can’t always be safely lowered onto a slab as a single unit, it’s usually assembled directly on top of the cured concrete. That slab must be sized accurately, fully cured, and perfectly level before building begins.
How Foundations Affect Installation
Gravel pads tend to be delivery-friendly, while concrete slabs can be paired with on-site assembly. Pressure-treated wood foundations are more flexible and can work with either approach, depending on access.
With Dakota, buildings can be prefabricated in the shop and then assembled on-site when needed. A mule tractor is used for maneuvering during delivery, ensuring the same quality and materials no matter how the shed reaches your property.
6 Steps To Prepare Your Site
Proper site preparation is just as important as choosing the right foundation. A well-prepped site ensures smoother delivery, easier installation, and better long-term performance.
1. Check Local Codes and Permit Requirements
Start by checking local building codes and regulations to stay compliant with any specific shed installation requirements. Zoning rules may affect how close your shed can be to property lines, how large it can be, and whether utilities can be added.
2. Choose the Best Location
Position the outdoor storage shed where it can take advantage of natural drainage patterns so water moves away from the structure. Avoid low spots where water tends to settle after storms.
Also consider daily use. Placing the shed near the house, garden, or driveway makes regular access much easier.
3. Clear and Prepare the Ground
Once you’ve chosen the spot, clear away grass, plants, roots, and debris to create a clean, stable base. Adding a layer of landscape fabric under a gravel pad or wood foundation helps control weeds and manage moisture over time.
4. Ensure the Ground Is Level
After clearing, ensure the ground is level to provide a stable shed base. Use a long level and measuring tools to check for high and low spots and make adjustments as needed. An unlevel foundation can twist the frame of the shed and cause complications over time, so this step is crucial.
5. Factor In Frost Depth
In colder climates, consider frost line depth, especially for concrete slabs or deeper footings. Frost depth can vary significantly across South Dakota and Minnesota, so it’s worth confirming local requirements before you begin.
6. Confirm Site Access for Delivery
Finally, think about access. Measure gate openings, check for overhead obstructions, and make sure there is enough room for equipment like a mule tractor to maneuver. Planning for access ahead of time prevents surprises on delivery day and helps installation go smoothly.
The 3 Best Foundation Types for a Long-Lasting Shed
1. Concrete Slabs

Concrete slabs are one of the most durable storage shed foundation options. They provide a flat, impermeable surface that evenly supports the shed’s weight to ensure long-term stability, especially for workshops, heavy equipment, or frequently used buildings.
Benefits
Concrete slabs are highly durable and low-maintenance, offering excellent protection against pests and moisture. They are fire-resistant and withstand harsh weather conditions when properly designed to meet local frost-depth requirements.
Installation Process
- Step 1: Ensure the area is free of debris and excavate to the necessary depth, typically around 4-6 inches.
- Step 2: Construct a temporary frame around the foundation's perimeter using 2’x4’ lumber to build a three-sided frame.
- Step 3: Fasten the frame to wooden or steel stakes from the outside to ensure it is easy to remove.
- Step 4: Mix and pour the concrete into the frame, then use a screed to level the surface.
- Step 5: Let the concrete cure for at least 24-48 hours to achieve maximum strength.
- Step 6: Remove the temporary frame after the shed is placed.
Concrete is ideal when you want the strongest, most permanent base possible. It does come with a higher upfront cost and requires careful planning to avoid frost-heave issues, but long-term maintenance is minimal.
Gravel Pads

A gravel base for sheds is another popular option, particularly using Class 5 gravel. Gravel pads are the standard foundation for many Dakota customers because they balance performance, cost, and flexibility.
They offer excellent drainage and prevent water from pooling under the shed, which helps protect the structure from moisture damage. In Midwest climates with freeze–thaw cycles and clay soils, drainage is a major advantage.
Benefits
Gravel pads are cost-effective, relatively easy to install, and can be adjusted or re-leveled if the ground shifts over time. They’re suitable for most outdoor storage sheds, garden sheds, and hybrid-use buildings.
Installation Process
- Step 1: Clear the area and dig to the required depth to ensure a stable shed base.
- Step 2: Construct a temporary frame around the foundation's perimeter using 2’x4’ lumber to build a three-sided frame.
- Step 3: Fasten the frame to wooden or steel stakes from the outside to ensure it is easy to remove.
- Step 4: Lay down landscape fabric to prevent weeds from growing. This helps maintain the integrity of the gravel pad and prevents unwanted vegetation.
- Step 5: Fill the frame with at least 3 to 4 inches of Class 5 gravel, spreading it evenly across the area.
- Step 6: Use a compactor to ensure the gravel is firmly packed and level.
- Step 7: Remove the temporary frame after the shed is placed.
Pressure-Treated Wood Foundations

Pressure-treated wood foundations are versatile and easier to install than concrete. They provide good support and are resistant to rot and pest damage when built and maintained properly. They’re especially useful for smaller sheds, lighter structures, or situations where you may want the option to move the shed later.
Benefits
Easy to install, relatively lightweight, and rot- and pest-resistant when using treated lumber. Wood foundations can sit slightly above grade to improve airflow and reduce direct moisture contact.
Installation Process
- Step 1: Clear and level the site, then place landscape fabric to prevent weeds from growing.
- Step 2: Construct a sturdy frame that matches the shed's dimensions, ensuring it is square and level.
- Step 3: Add a layer of gravel inside the frame to enhance the foundation’s drainage and stability.
- Step 4: Attach the shed to the wooden frame using appropriate fasteners, ensuring a secure and stable connection.
Your Foundation Breakdown
- Good: Pressure-treated wood foundations are the most affordable and easiest to install. They work well for small to medium sheds on well-drained soil and may need occasional re-leveling or board replacement.
- Better: Class 5 gravel pads provide excellent drainage, handle freeze–thaw cycles well, and are suitable for most sheds. They are cost-effective and can be re-leveled over time.
- Best: Concrete slabs offer the strongest, most permanent base with maximum protection from moisture and pests. They are ideal for heavy use and long-term workshops and have the lowest long-term maintenance, though with a higher upfront cost and more planning.
Determining the Best Foundation for Your Shed Needs
Selecting the best foundation for your shed depends on your specific needs and environmental conditions. Consider your soil type, climate, and the intended use of the shed. Areas with high moisture levels or clay-heavy soils may benefit from a gravel base for better drainage, while concrete slabs offer extreme durability during harsh weather and heavy use.
Comparing the costs and benefits of each foundation type is essential for making an informed decision. While concrete slabs may have higher initial costs, they offer long-term durability and minimal maintenance, which can save money over time. Gravel pads and pressure-treated wood foundations are more cost-effective upfront but may require occasional re-leveling or ongoing care.
Factors to Consider
- Soil Type: Clay, sandy, or moisture-heavy soils influence drainage and long-term stability.
- Slope & Drainage: Water should naturally flow away from the shed, not toward it.
- Shed Size & Weight: Larger or equipment-heavy sheds require stronger support.
- Intended Use: Workshops, studios, and heavy storage need sturdier foundations.
- Local Climate & Frost Line: Crucial for preventing frost heave and slab cracking.
- Budget & Maintenance Preference: Balance upfront cost with long-term upkeep.
Consulting with professionals can give you valuable insights and help you choose the best foundation for your shed. Experts can assess your site, recommend suitable materials, and ensure the foundation is properly constructed to support long-term stability.
To avoid problems later, watch out for common mistakes like skipping compaction, using decorative gravel instead of Class 5, building on unlevel ground, ignoring frost depth, or forgetting landscape fabric. Investing a bit more effort up front pays off in a foundation that lasts.
Signs Your Storage Shed Foundation Needs Attention
Even a well-built outdoor storage shed foundation can change over time. Catching issues early helps you correct small problems before they become big repairs.
Watch for signs like:
- Doors or windows suddenly sticking or refusing to close properly
- Soft, sagging, or spongy areas in the shed floor
- Depressions or shifting gravel in a gravel pad, indicating settling or erosion
- Water pooling around the base after rain or snowmelt
- Visible leaning or settling when you step back and view the shed from a distance
- Cracks forming in a concrete slab, especially if they widen or spread
- Gaps appearing between the shed floor and foundation, particularly at the corners
- Evidence of rodent tunnels or openings under the shed
- Wood foundation boards showing rot, mold, or pest activity
- Items inside the shed rolling or leaning on their own
If you notice these issues, it may be time to re-level the foundation, improve drainage, or make targeted repairs.
Maintenance Tips to Extend the Life of Your Shed Foundation
Regular maintenance is essential to ensure the longevity and stability of your outdoor storage shed’s foundation. By keeping an eye on the base, you can prevent minor issues from turning into costly repairs.

Conduct thorough inspections of your storage shed foundation at least twice a year and after severe weather events. Look for signs of wear, damage, or settling, like cracks in concrete slabs, shifts in gravel pads, or signs of rot in wooden foundations. Addressing uneven areas early can help keep doors and windows functioning correctly.
It’s also important to keep the area around your outdoor storage shed foundation clear of leaves, dirt, and other debris that can trap moisture. When moisture accumulates, it can lead to mold and mildew growth or cause wood to rot and metal to corrode. Regularly sweep or rake around the shed and consider adding a border of gravel around the perimeter to improve drainage and discourage pests.
At the first sign of any problem, take action to prevent further damage. Seal small cracks in concrete with an appropriate filler, replace rotting or damaged boards in wood foundations, and add or re-compact gravel where a pad has settled. If necessary, have a gravel pad re-leveled to restore proper support.
Prompt, small repairs help maintain the structural integrity of your shed and foundation and reduce the likelihood of major work down the road.
Set Your Shed Up for Success
A strong, long-lasting shed starts with a strong outdoor storage shed foundation. The base you choose, and how well you prepare and maintain it, will determine how your shed performs in every season.
By understanding your soil, climate, and intended use, you can choose between wood, gravel, or concrete with confidence and avoid the most common foundation mistakes. A little extra planning on the front end pays off in a shed that stays level, dry, and functional for years to come.
If you’re ready to take the next step, explore our Shed Buying Workbook for more guidance on site preparation, foundation choices, and finding the right shed for your property.